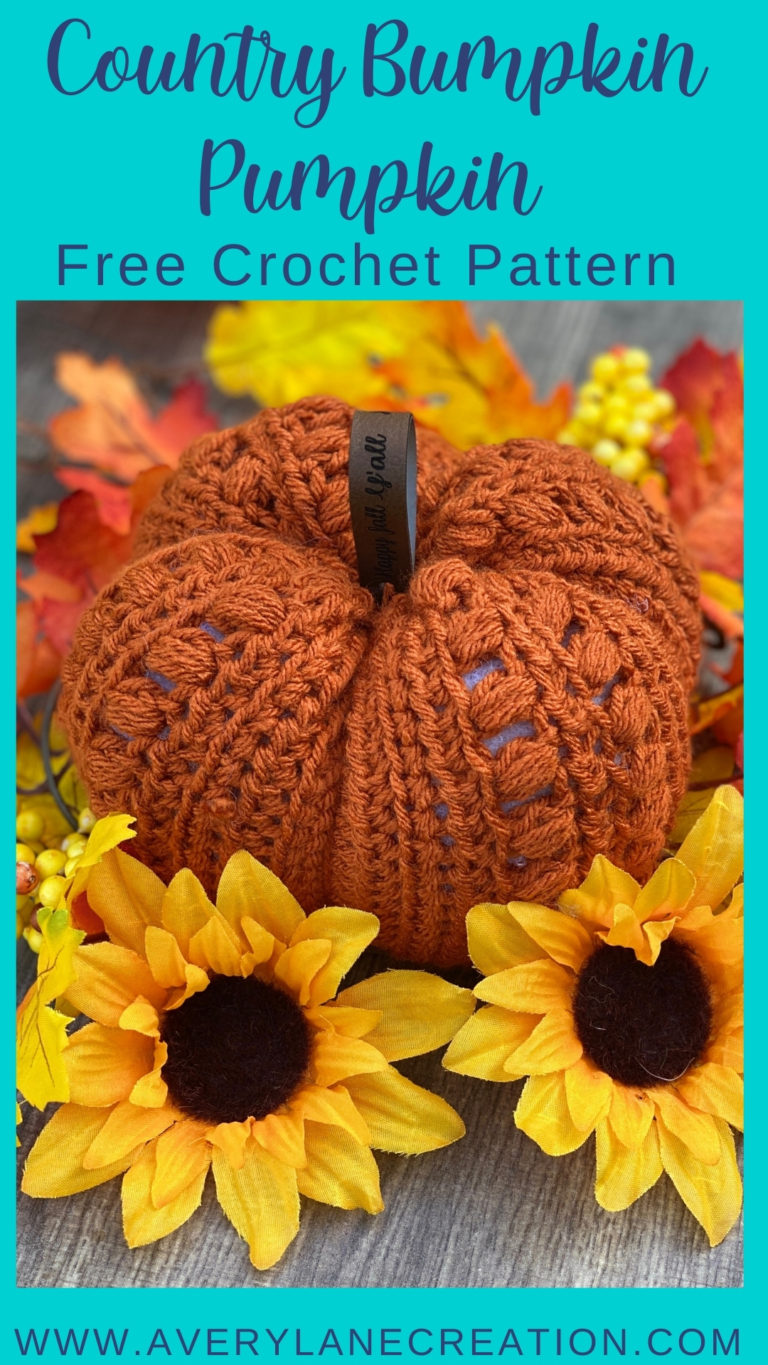
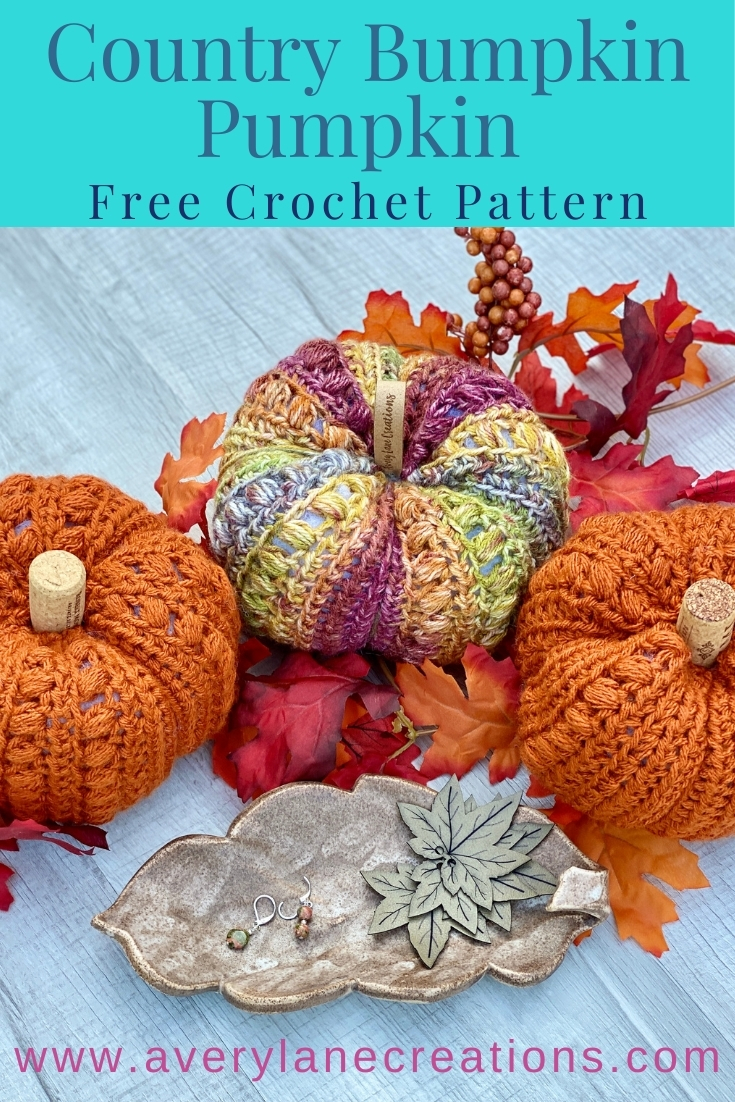
Fall is inching closer and I am so excited to share this Country Bumpkin Pumpkin free crochet pattern with you. Fall is my favorite time of year. I just love all of the beautiful colors that pop up and things just seem to slow down.
The Country Bumpkin Pumpkin is full of texture and quick to make, which means that it won’t be long before your home will be filled with not just one but a dozen! Or if you are like me and enjoy gifting, you will keep making them because you want to keep some for yourself.
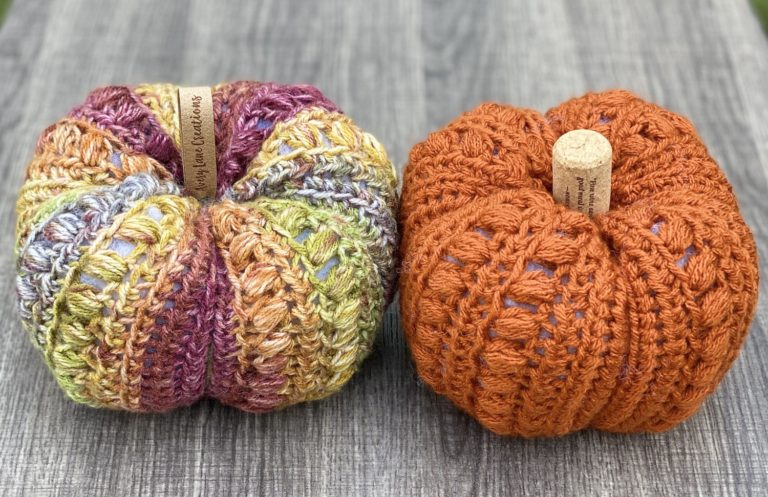
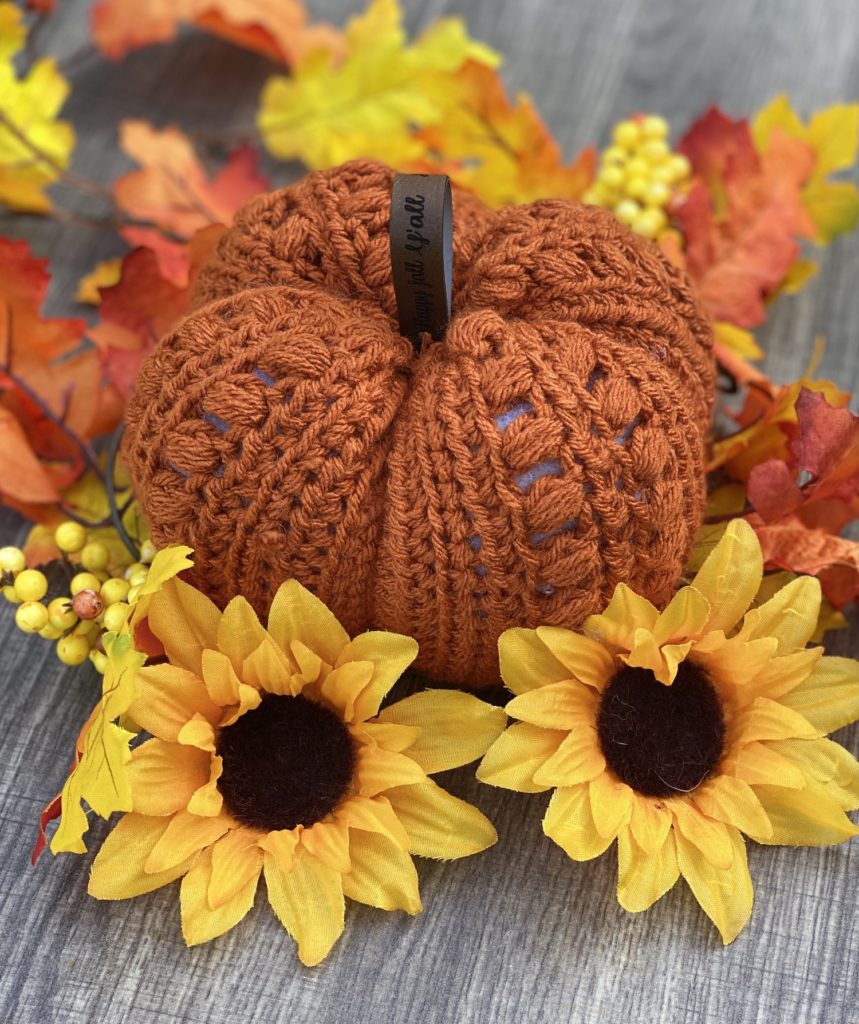
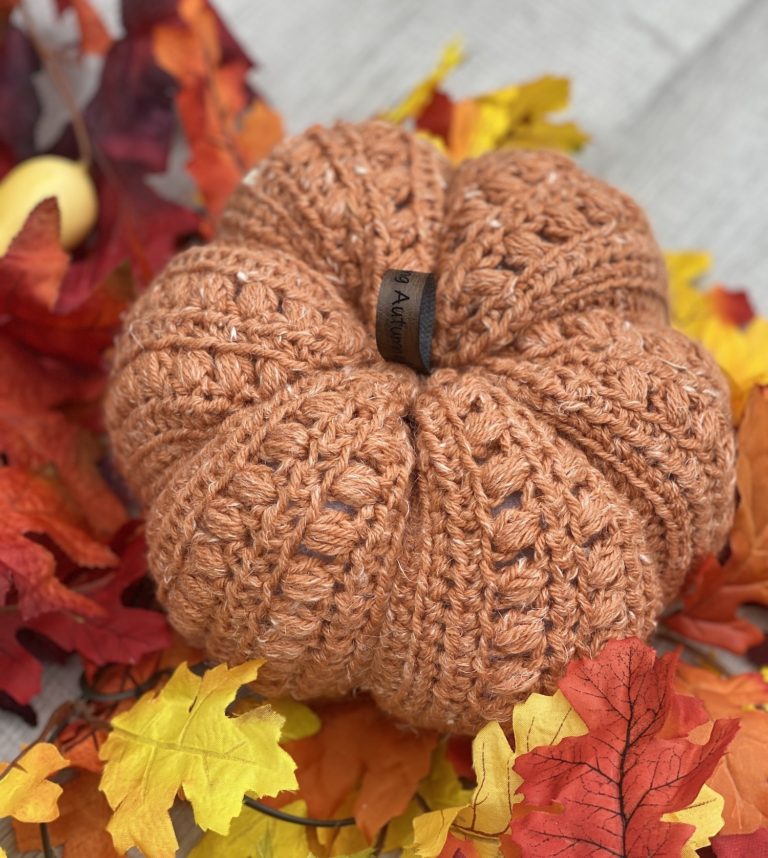
This pumpkin looks great in any yarn weight or coordinating hook size. I have a stack of yarn that I set aside just for pumpkins. I have some beautiful bulky weight yarn and some velvet yarn that I can’t wait to use for these.
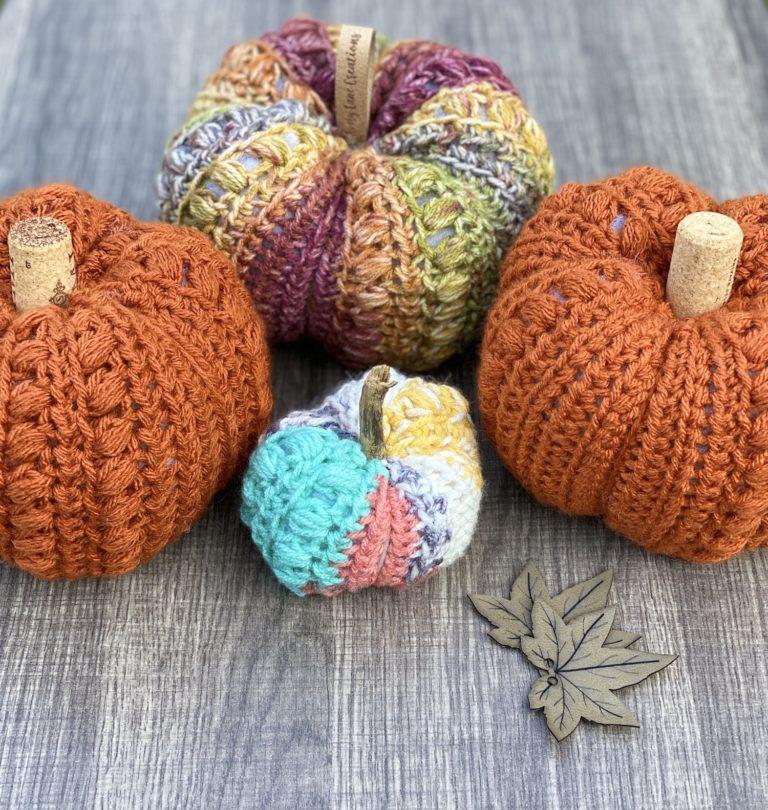
My pattern testers had so much fun making these and they suggested I should do a mini version too. This led to a mini and a large version. I just couldn’t help myself.
I have so much fun finding different items to use for stems. I really like to use wine corks and pumpkin stem tags from Idaho Taylor Made. My favorite tags are the “Happy Fall Y’all” and the “Leaves are Falling Autumn is Calling“.
Country Bumpkin Pumpkin Crochet Pattern (medium size)
Materials
I/5.5mm Crochet Hook
91 yards (84 meters) of worsted (4) weight yarn (I Love This Yarn, Caron Simply Soft, ALC Yarns)
Measuring Tape
Tapestry Needle
Scissors
Cork, twig, cinnamon sticks, tag, or other items to use for a tem
CH: Chain CSSC: Cross Stitch Single Crochet (see below for instructions) DC: Double Crochet FHDC: Foundation Half Double Crochet HDC: Half Double Crochet HDCFLO: Half Double Crochet in Front Loop Only SC: Single Crochet SLST: Slip Stitch ST(S): Stitch(es) SK: Skip PS: Puff Stitch (see below for instructions)
Gauge
9 HDC x 8 rows = 3 in x 3 in
Special Stitches
Cross Stitch Single Crochet (CSSC): Insert your hook into the stitch, yarn under (place your hook over the top of your yarn) pull up a loop, yarn over and pull through the two loops.
Puff Stitch (PS): Yarn over, insert hook into stitch, yarn over and pull up a loop, * yarn over, go back into the stitch, yarn over and pull up a loop, repeat from * 2 more times. You will have 9 loops on your hook. Yarn over and pull through all 9 loops. Finish puff stitch with a chain 1.
Notes
This pattern uses American Standard Terms.
The chains at the beginning of each row do not count as a stitch.
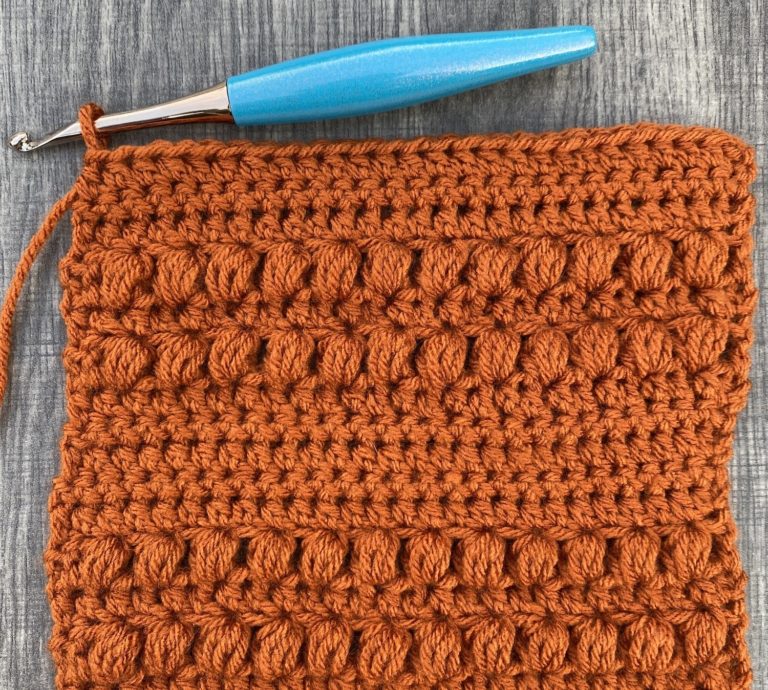
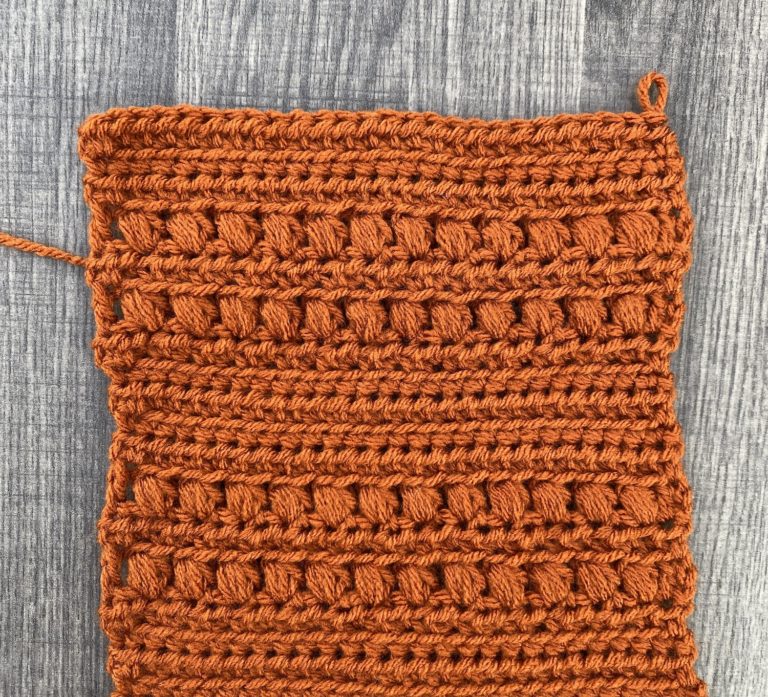
Before I start shaping the pumpkin, my work is 7 inches wide and 14 inches long.
You can easily adjust this pattern to make a smaller or bigger pumpkin by using fewer or more stitches for your FHDC and fewer or more rows. Just be sure that your FHDC is an even number.
This pattern is very versatile. You can use any hook size and any yarn size. Just work the pattern based on the measurements.
You can find a free step by step video tutorial for this crochet pumpkin on my YouTube channel. (September 2023 update)
In this video tutorial, I will take you step by step through the pattern, show you how to shape your pumpkin, plus show you two different stems that you can use for your pumpkin and how to attach them.
Pattern
FHDC 26
Row 1: Ch 1, turn, HDC in same ST as CH 1, HDCFLO in next 24 STS, HDC in last ST (26)
Row 2: CH 1, turn, SC in same ST as CH 1, CSSC in next 24 STS, SC in last ST (26)
Row 3: Repeat Row 1
Row 4: CH 2, turn, DC in same ST as CH 2, * PS in next ST, SK next ST, repeat from * until last ST, DC in last ST (12 PS & 2 DC = 26)
Row 5: Repeat Row 1
Row 6: Repeat Row 4
Row 7: Repeat Row 1
Row 8: Repeat Row 2
Row 9: Repeat Row 1
Row 10: Repeat Row 2
Row 11: Repeat Row 1
Row 12: Repeat Row 4
Row 13: Repeat Row 1
Row 14: Repeat Row 4
Keep repeating Rows 7, 8, 9, 10, 11, 12, 13 & 14 (in that order) until you reach 13 inches. This took me 30 rows and I ended on a Row 14 repeat. Then, work the following rows to finish.
Row 31: Repeat Row 1
Row 32: Repeat Row 2
Row 33: Repeat Row 1 (my work is 14 inches after this row)
Now you will start making it look like a pumpkin:
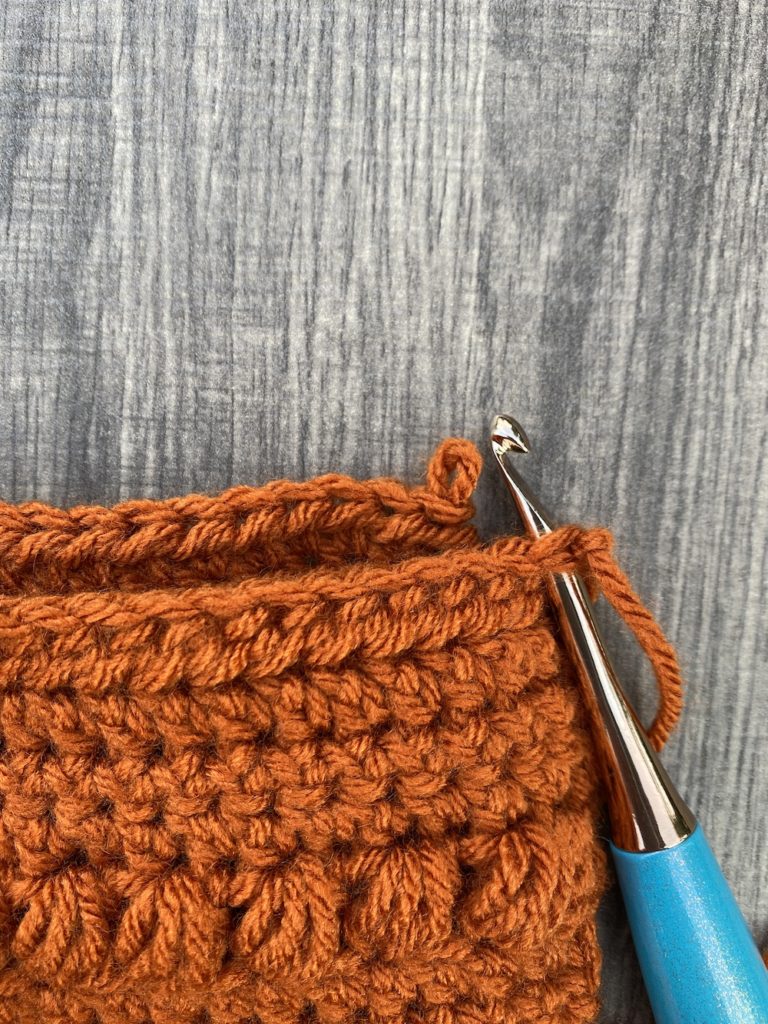
Fold your work in half with the wrong side facing out.
Wrong Side
Right Side
2. Turn your work so your working loop is on your right.
3. Slip your working loop through the first stitch in the row so you are working on the correct side.
4. Line up your first and last rows and SLST the rows together.
5. Fasten off, leaving a 36-inch tail.
6. Turn right side out.
Working loop on your right.
Slipping working loop through the first stitch.
Line up stitches & SLST both rows together.
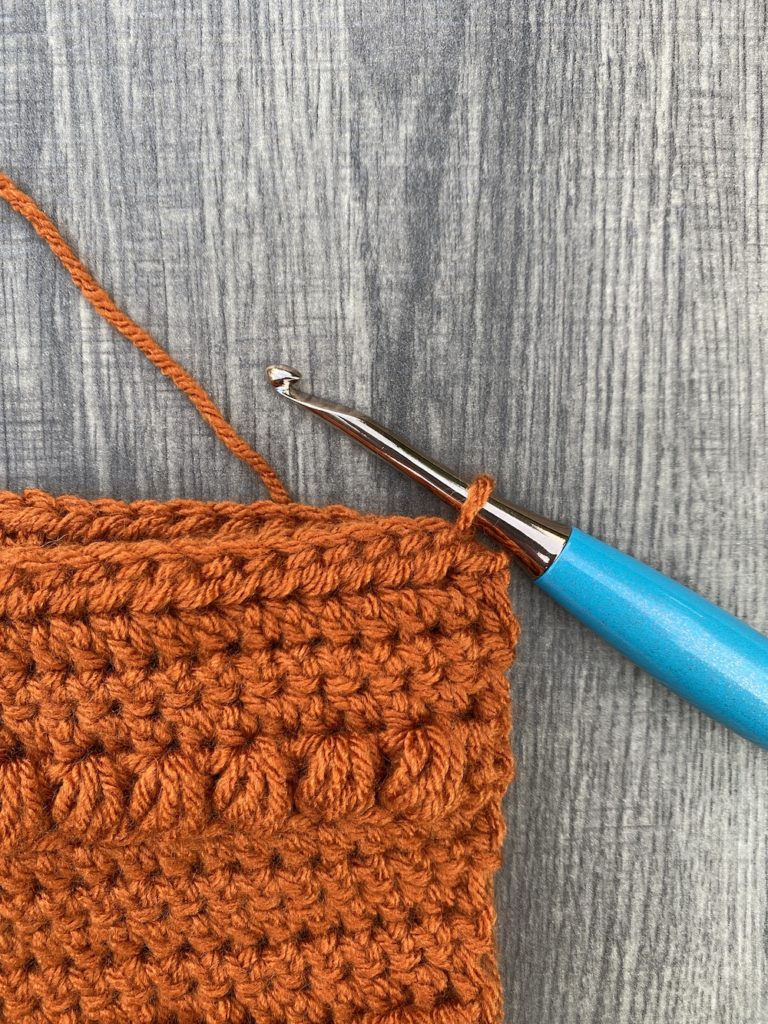
Using your yarn tail, close the bottom of your pumpkin by weaving the tail in and out of every 3 to 4 loops. Pull tight to close. Slightly weave the tail in to keep the hole secure. Leave tail as is. Do not weave in ends. You will be using it to shape your pumpkin.
Add Poly-Fil. Do not overfill.
Using your slip knot yarn tail, close the top of your pumpkin by weaving the tail in and out of every 3 to 4 loops. Add your stem before tightening the hole. Secure your yarn tail so the hole stays put. Do not weave in ends. You may need to adjust this again.
Remove stem. Using the yarn tail at the bottom of your pumpkin, go through the center of the bottom and come up through the center of the top.
Wrap your yarn tail around the side of the pumpkin that doesn’t have puff stitches (the row 7-11 repeats). Lay the yarn in the center of these rows and go through the center of the bottom of the pumpkin again. Pull yarn tight to secure. The tighter you pull, the shorter your pumpkin.
Repeat Step 5 3x’s. Fasten off and weave in ends.
Check and make sure you have enough Poly-Fil in your pumpkin.
Add stem to the top of your pumpkin and tighten the hole at the top. Fasten off and weave in ends.
Thank you so much to all my amazing pattern testers. My patterns would not be what they are without their help. You can see all of their cute pumpkins below.
Previous
Next
My clover darning needle made shaping the pumpkin and weaving in the ends a breeze. The bent tip and jumbo size really make a big difference.
"Happy Fall Y'all" tag by IdahoTaylorMade
As you can see, we all had so much fun making these pumpkins and we couldn’t stop at just one.
I think the little minis are my favorite. They are super quick and so adorable!!
The ad free PDF is available on Ravelry and Etsy. It includes all 3 pumpkins sizes.
There you have it! The Country Bumpkin Pumpkin crochet pattern. I hope this quickly becomes one of your favorite things to make. I would love to see your pumpkins! Feel free to tag me in your posts and use the hashtags #averylanecreations and #alcpatterns
This website uses cookies to improve your experience. We'll assume you're ok with this, but you can opt-out if you wish. Cookie settingsACCEPT
Privacy & Cookies Policy
Privacy Overview
This website uses cookies to improve your experience while you navigate through the website. Out of these cookies, the cookies that are categorized as necessary are stored on your browser as they are essential for the working of basic functionalities of the website. We also use third-party cookies that help us analyze and understand how you use this website. These cookies will be stored in your browser only with your consent. You also have the option to opt-out of these cookies. But opting out of some of these cookies may have an effect on your browsing experience.
Necessary cookies are absolutely essential for the website to function properly. This category only includes cookies that ensures basic functionalities and security features of the website. These cookies do not store any personal information.
Any cookies that may not be particularly necessary for the website to function and is used specifically to collect user personal data via analytics, ads, other embedded contents are termed as non-necessary cookies. It is mandatory to procure user consent prior to running these cookies on your website.


3 Comments
Pingback:
Pingback:
Pingback: