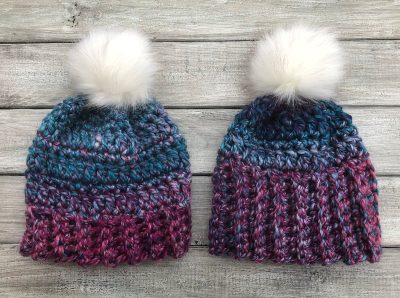
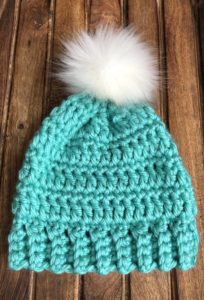
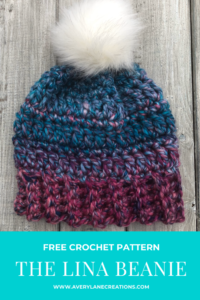
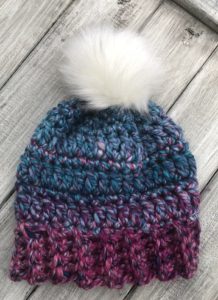
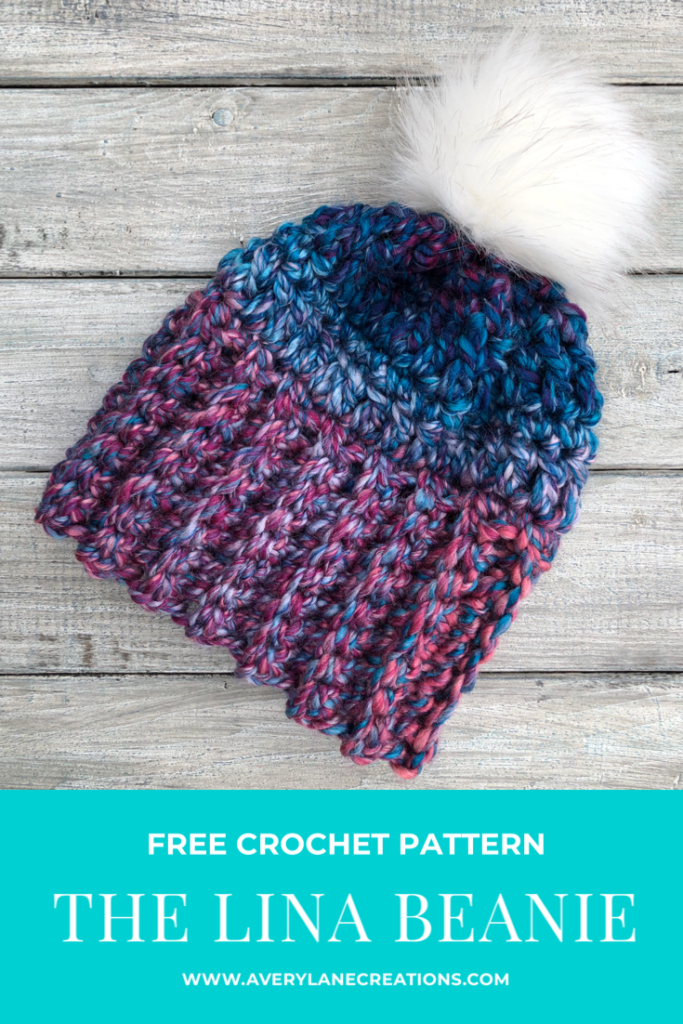
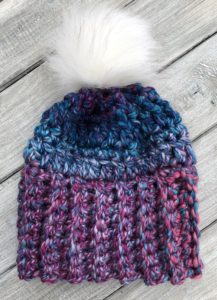
I love to make beanie hats with chunky yarn. They work up so quickly and look great too. My very first pattern design was this chunky beanie, the Lina Beanie.
I designed this beanie a little over a year ago now and to be honest, I had no clue what I was doing. It was so much fun though and it started me on my crochet pattern designing journey. Now that I have a year of designing under my belt, I thought I would go back to this very first crochet pattern and give it some more love and a much needed new look.
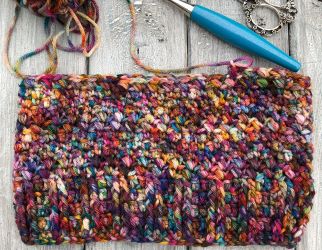
This chunky beanie crochet pattern is beginner friendly. It uses basic crochet stitches-single and double crochets. This pattern is written for a child size beanie hat, but I have details in the notes on how to adjust it to make any size that you need.
I know some crocheters like the look of the taller brims, so I will be sharing two pattern versions with you- regular brim and taller brim.
You will be using bulky weight yarn for this beanie. The bulky weight yarns that I like to use are Lion Brand Hometown USA; Lion Brand Wool-Ease Thick & Quick; Yarn Bee Dream Spun & Yarn Bee True Colors.
ABBREVIATIONS: BLO – Back Loop Only CH – Chain DC – Double Crochet FLO – Front Loop Only SC – Single Crochet SC2TOG – Single Crochet 2 Together (single crochet decrease) SLST – Slip Stitch ST(S) – Stitch(es)
Notes:
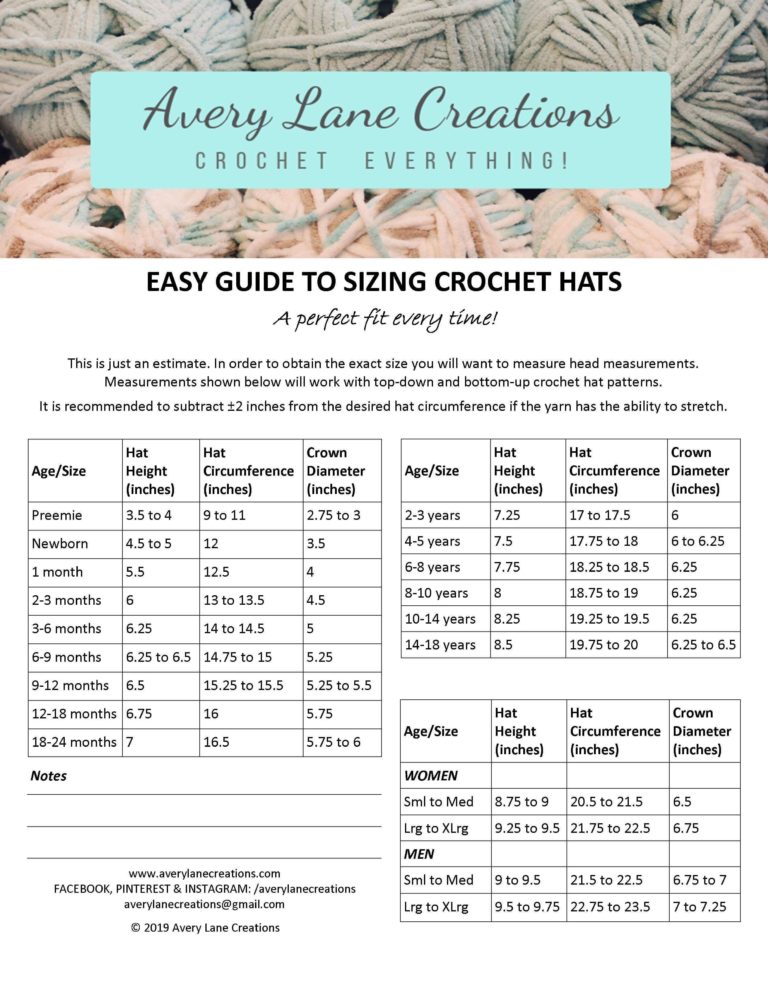
Using a sizing chart or head measurements you can easily adjust this pattern to fit any size you want.
For the brim Continue working your rows until you reach your desired length (usually 1-2 inches less than head circumference; depending on how much stretch the yarn has to it).
For the hat Continue alternating rounds until you reach 1/2 to 1 inch from your desired hat height then start your decrease rounds. For a slouchy look, keep alternating your rounds until you reach the desired hat height then start your decrease rounds.
PATTERN: BRIM (regular length brim version)
CH 5.
Row 1: SC in second CH from hook, SC in each remaining CH, CH 1, turn (4).
Row 2: SC in BLO in first stitch in row and in each remaining ST, CH 1, turn (4).
Repeat Row 2 until you reach your desired length. For the child size hat, I stopped at 16 inches. (I make sure that my working yarn on the last row is on the same side as the slip knot from the beginning.)
Fold the brim in half so that your slip knot and last row will be on your right, be sure it is not twisted.
SLST your last row and chain row together by slip stitching in the FLO of the last row into the chain edge of the first row (4).
Flip the seam right side out so you can work on the top edge of the brim.
HAT
Round 1: CH 1, SC around the top edge of the brim. (There is not definite stitch for your SC so just place them in the holes that you can fit your hook in at the end of each row of the brim. Be sure to end with an even number of stitches.)
Round 2: CH 2, DC in same ST as CH 2, DC in each remaining ST, SLST to first DC.
Round 3: CH 1, SC in same ST as CH 1, SC in each remaining ST, SLST to first SC.
Keep repeating rounds 2 & 3 until your hat reaches about 7 inches. Then start decrease rounds. (My hat reached 7 inches after Round 7.)
Round 8: CH 1, SC in same ST as CH 1, SC in next ST, SC2TOG ,* SC in next ST, SC in next ST, SC2TOG, repeat from * to finish round.
Round 9: CH 1, SC in same ST as CH 1, SC2TOG, *SC in next ST, SC2TOG, repeat from * to finish round. Your hat should measure 7.75 to 8 inches height at this point.
Finish off. Leaving a long tail to close your hat with.
Closing Hat: Using your tapestry needle, weave the tail of your yarn in and out of the top of the stitches from last round. Pull tight to close. Weave in ends.
PATTERN: BRIM (taller length brim version)
CH 9.
Row 1: SC in second CH from hook, SC in each remaining CH, CH 1, turn (8).
Row 2: SC in BLO in first stitch in row and in each remaining ST, CH 1, turn (8).
Repeat Row 2 until you reach your desired length. For the child size hat, I stopped at 16 inches. (I make sure that my working yarn on the last row is on the same side as the slip knot from the beginning.)
Fold the brim in half so that your slip knot and last row will be on your right, be sure it is not twisted.
SLST your last row and chain row together by slip stitching in the FLO of the last row into the chain edge of the first row. (8).
Flip the seam right side out so you can work on the top edge of the brim.
HAT (taller length brim version)
Round 1: CH 1, SC around the top edge of the brim. (There is not definite stitch for your SC so just place them in the holes that you can fit your hook in at the end of each row of the brim. Be sure to end with an even number of stitches.)
Round 2: CH 2, DC in same ST as CH 2, DC in each remaining ST, SLST to first DC.
Round 3: CH 1, SC in same ST as CH 1, SC in each remaining ST, SLST to first SC.
Keep repeating rounds 2 & 3 until your hat reaches about 7 inches.Then start decrease rounds. (My hat reached 7 inches after Round 4.)
Round 5: CH 1, SC in same ST as CH 1, SC in next ST, SC2TOG ,* SC in next ST, SC in next ST, SC2TOG, repeat from * to finish round.
Round 6: CH 1, SC in same ST as CH 1, SC2TOG, *SC in next ST, SC2TOG, repeat from * to finish round. Your hat should measure 7.75 to 8 inches height at this point.
Finish off. Leaving a long tail to close your hat with.
Closing Hat: Using your tapestry needle, weave the tail of your yarn in and out of the top of the stitches from last round. Pull tight to close. Weave in ends.
———————————-
You can find my original blog post about the Lina Beanie pattern here.
I also have a video tutorial for the Lina Beanie on my YouTube channel. You can find it here.
I will be updating this video soon. Subscribe to my channel to be notified when I have new video tutorials available.
Which brim do you prefer – taller or regular? Please let me know in the comments section.
I hope you enjoy this pattern as much as I do. I would love to see the Lina beanies you make. Feel free to share them with me on social – Facebook and Instagram
If you share any of your makes from my patterns on Instagram be sure to use the hashtags #alcpatterns and #averylanecreations so I can I will be sure to see them.
You can find more of my crochet patterns on Ravelry and in my new EtsyShop.
I just joined yesterday to your YouTube. I received the pattern for the Lina Beanie. I’m about halfway done. Definitely checking out your other patterns.
I love crocheting hats! Love a pattern that works up quickly as they are perfect last minute gifts for when one of my kids decides that they need something for one of their friends!
This website uses cookies to improve your experience. We'll assume you're ok with this, but you can opt-out if you wish. Cookie settingsACCEPT
Privacy & Cookies Policy
Privacy Overview
This website uses cookies to improve your experience while you navigate through the website. Out of these cookies, the cookies that are categorized as necessary are stored on your browser as they are essential for the working of basic functionalities of the website. We also use third-party cookies that help us analyze and understand how you use this website. These cookies will be stored in your browser only with your consent. You also have the option to opt-out of these cookies. But opting out of some of these cookies may have an effect on your browsing experience.
Necessary cookies are absolutely essential for the website to function properly. This category only includes cookies that ensures basic functionalities and security features of the website. These cookies do not store any personal information.
Any cookies that may not be particularly necessary for the website to function and is used specifically to collect user personal data via analytics, ads, other embedded contents are termed as non-necessary cookies. It is mandatory to procure user consent prior to running these cookies on your website.


23 Comments
Melissa
Love this pattern and the colors are awesome!
Tabitha King
I love the beautiful colors in this pattern!
Dale Edney
Love beanies they make quick and easy gift ideas
Peggy Brewster
Love this pattern
Callie Fish
I love using bulky yarn! This is a beautiful, yet simple, design! Can’t wait to try it!
Tammy
I love this hat, regular brim. Thank you for the pattern
Katie
Love the stitch pattern! Can’t wait to make one!
Kimberly
I just joined yesterday to your YouTube. I received the pattern for the Lina Beanie. I’m about halfway done. Definitely checking out your other patterns.
Nicky
That is so great!! Thank you for joining my YouTube channel!
Synthia
This hat looks too warm and cozy and appears to work up quick, I love it.
Charity
I love the story of how u made the pattern and love the hat
Jo Coombs
I love crocheting hats! Love a pattern that works up quickly as they are perfect last minute gifts for when one of my kids decides that they need something for one of their friends!
Teresa Barrette
Love this hat pattern!
Nicky
Thanks Teresa!
Whitney
What a beautiful pattern. Love the taller brim!
Joanna Coombs
Thank you! I love hats, and I like how I can turn up the brim on this one as much or as little as I want. 🙂
Yvette James
Beautiful beanie and the color is awesome
Theresa Faria
beginner crochet hat, going to try. In Reno Nevada still getting snow!
Pearl
Love this hat!!!!! Great pattern❤️
Karen
Can’t wait to get started on this hat. I just found your page and will be returning often.
Melissa
Love this pattern! I prefer the regular brim but I like the tall one too!
Torrie
Love the colors of this hat!! Thanks for the cool pattern!!
Pingback: